Tampaknya ada satu hal yang kurang dari tutorial cacti yang pernah saya tulis duluw. Disini saya akan menambahkan sedikit saja, bagaimana mengaktifkan SNMP pada linux, sehingga bisa dimonitor di server Cacti.
1. Langkah pertama tentu ajai install snmp jika belum terinstall, pada system berbasis Debian gunakan perintah:
#apt-get install snmpd
Jangan lupa buka port snmp jika firewall digunakan. Contoh open port 161 dan 162 tcp/udp untuk IP server Cacti (misal 10.11.129.90) jika menggunakan iptables.
iptables -F
….
iptables -A INPUT -p tcp -s 10.11.129.90 –dport 161 -j ACCEPT
iptables -A INPUT -p udp -s 10.11.129.90 –dport 161 -j ACCEPT
iptables -A INPUT -p tcp -s 10.11.129.90 –dport 162 -j ACCEPT
iptables -A INPUT -p udp -s 10.11.129.90 –dport 162 -j ACCEPT
2. Kemudian lakukan konfigurasi snmp
Sebelumnya jika perlu, backup terlebih dahulu file snmpd.conf
#cp /etc/snmp/snmpd.conf /etc/snmp/snmpd.conf.asli
Berikut ini adalah contoh file snmpd.conf. Lakukan perubahan seperlunya pada network dan community name
####
# First, map the community name “public” into a “security name”
# sec.name source community
com2sec local localhost rasengan
com2sec localnet 10.11.129.0/24 rasengan
####
# Second, map the security name into a group name:
# groupName securityModel securityName
group MyRWGroup v1 local
group MyRWGroup v2c local
group MyRWGroup usm local
group MyROGroup v1 localnet
group MyROGroup v2c localnet
group MyROGroup usm localnet
####
# Third, create a view for us to let the group have rights to:
# Make at least snmpwalk -v 1 localhost -c public system fast again.
# name incl/excl subtree mask(optional)
view all included .1 80
####
# Finally, grant the group read-only access to the systemview view.
# group context sec.model sec.level prefix read write notif
access MyROGroup “” any noauth exact all none none
access MyRWGroup “” any noauth exact all all none
#############################################
# System contact information
#
# It is also possible to set the sysContact and sysLocation system
# variables through the snmpd.conf file:
syslocation Semarang
syscontact Hafidz <saya@hafidz.web.id>
# Example output of snmpwalk:
# % snmpwalk -v 1 localhost -c public system
# system.sysDescr.0 = “SunOS name sun4c”
# system.sysObjectID.0 = OID: enterprises.ucdavis.ucdSnmpAgent.sunos4
# system.sysUpTime.0 = Timeticks: (595637548) 68 days, 22:32:55
# system.sysContact.0 = “Me <me@somewhere.org>”
# system.sysName.0 = “name”
# system.sysLocation.0 = “Right here, right now.”
# system.sysServices.0 = 72
# —————————————————————————–
# Make sure mountd is running
proc mountd
# Make sure there are no more than 4 ntalkds running, but 0 is ok too.
proc ntalkd 4
# Make sure at least one sendmail, but less than or equal to 10 are running.
proc sendmail 10 1
# a simple hello world
exec echotest /bin/echo hello world
# Check the / partition and make sure it contains at least 10 megs.
disk / 10000
# Check for loads:
load 12 14 14
3. Restart service snmp
#/etc/init.d/snmpd restart
4. Lakukan langkah berikut agar service snmpd otomatis distart waktu system boot.
#chkconfig snmp on
Konfigurasi SNMP pada linux selesai, pada cacti lakukan add device untuk system linux yang baru aja diaktifin service snmp-nya.
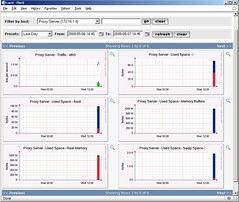
Dan ini tampilan Preview untuk system linux yang baru beberapa menit di-add pada cacti

